How to Put Yourself in a Photo with a Picture Using AI
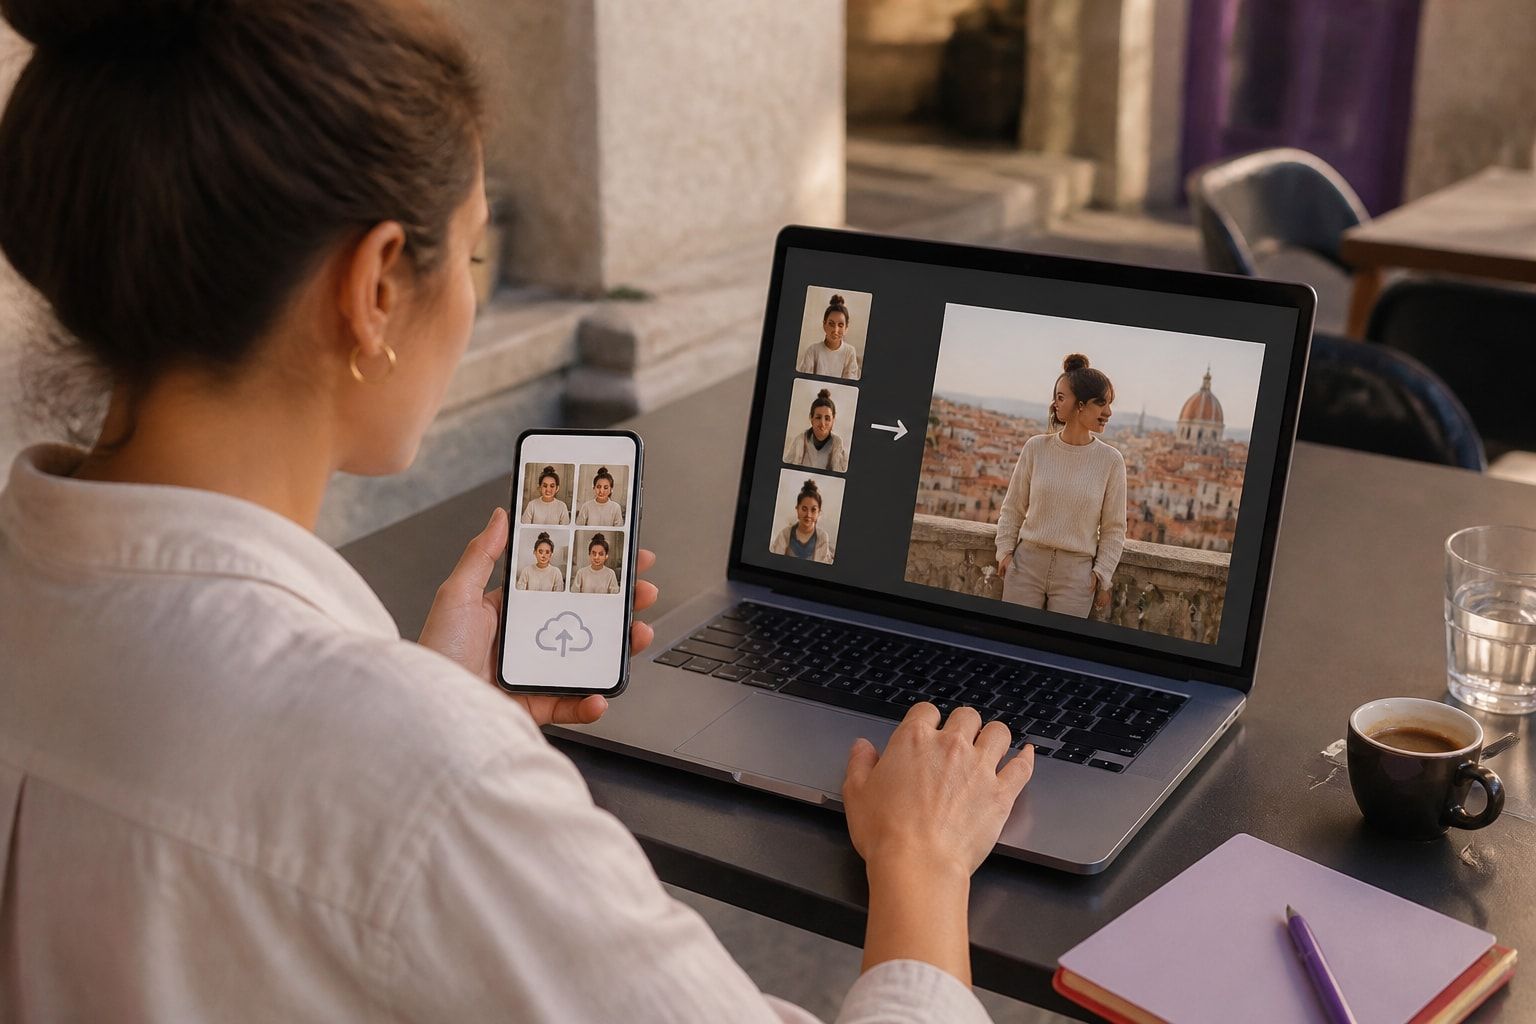
To put yourself in a photo with a picture, you upload clear reference photos of your face and an image of the scene, then use an AI tool to place you in that scene while keeping your likeness intact. The method you choose determines whether the result looks like you or like a polished stranger, so the details below matter.
This guide covers the three common approaches, how to prepare your source images, how to match lighting and framing, and how to check the result before it goes on a dating profile or a LinkedIn page.
What "Photo with a Picture" Actually Means
A photo with a picture usually means one of three tasks: adding a person into an existing scene, layering one image over another, or generating a new image of you based on reference shots. Each task suits a different goal. If you want the simpler case of merging two existing pictures, see our guide to combining two photos into one image.
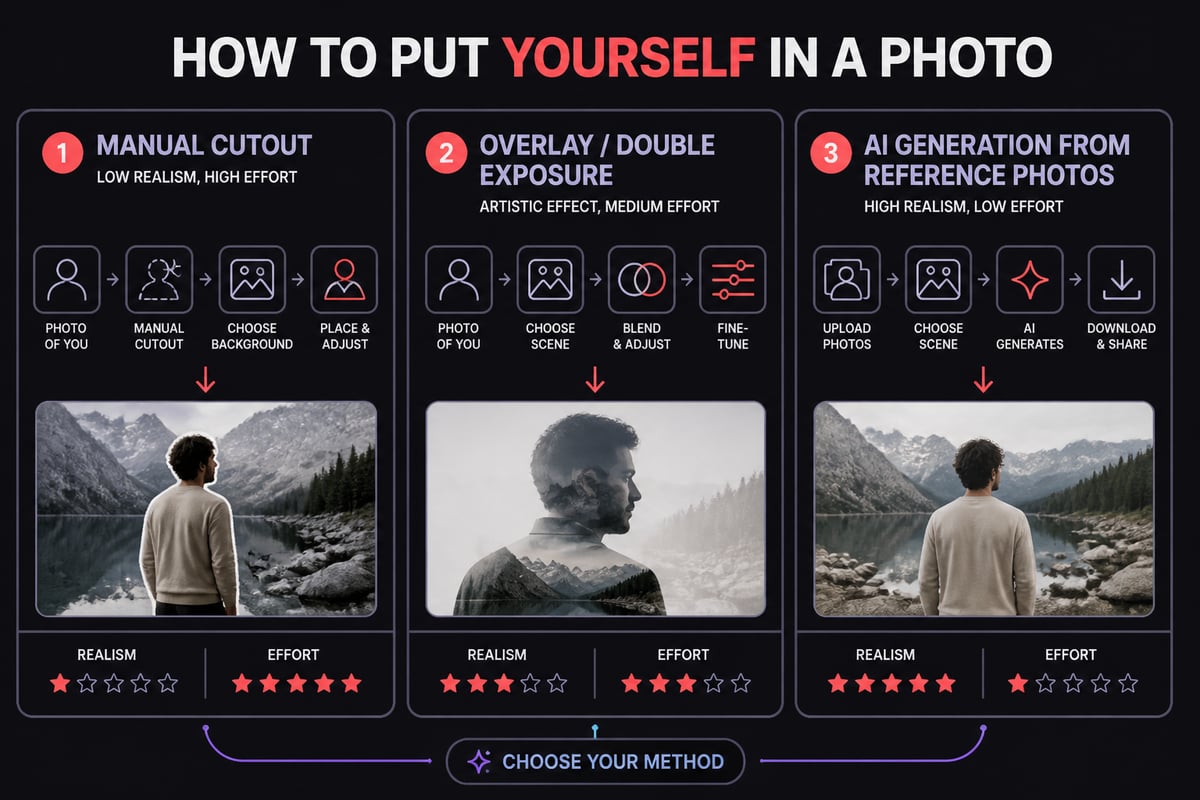
- Overlay or double exposure: Two images are blended into one. This is a creative effect, popular for posters and artistic social posts.
- Cut-and-paste compositing: You remove the background from a photo of yourself and place the cutout on another image. It works for simple graphics, but edges, shadows and lighting rarely match.
- AI generation from references: An AI model learns your face from several photos and generates you inside a scene. This is the approach that produces believable results for profiles and travel images.
For singles and professionals, the third approach is the most useful. A pasted cutout reads as fake within seconds, and a viewer who senses a fake will distrust the rest of the profile.
Manual Methods: Overlays and Cutouts
Manual editing works when you want a graphic effect, and it fails when you want a believable photograph. Understanding why helps you decide when to stop editing and start generating.
The standard manual workflow has five steps:
- Open your base picture and your portrait in an editor.
- Remove the background from the portrait using an automatic selection tool.
- Place the cutout on the base picture and resize it to match the scale of nearby objects.
- Adjust brightness, color temperature and contrast so the two images agree.
- Add a soft shadow beneath the figure so it appears to touch the ground.
The weak points are consistent. Hair edges look jagged, the light direction on your face rarely matches the light in the scene, and the perspective is usually wrong. A person standing on a beach at eye level cannot be cut from a photo taken from above and still look right.
Generative tools reduce some of this work. Adobe's Photoshop on the web guide notes that its Generative Fill workflow supports uploading a reference image and deducts one standard generative credit per generation. That makes it practical for adding objects, though a general-purpose editor is built to fill regions, not necessarily to preserve a specific person's face across many scenes.
How to Put Yourself in a Photo with a Picture Using AI
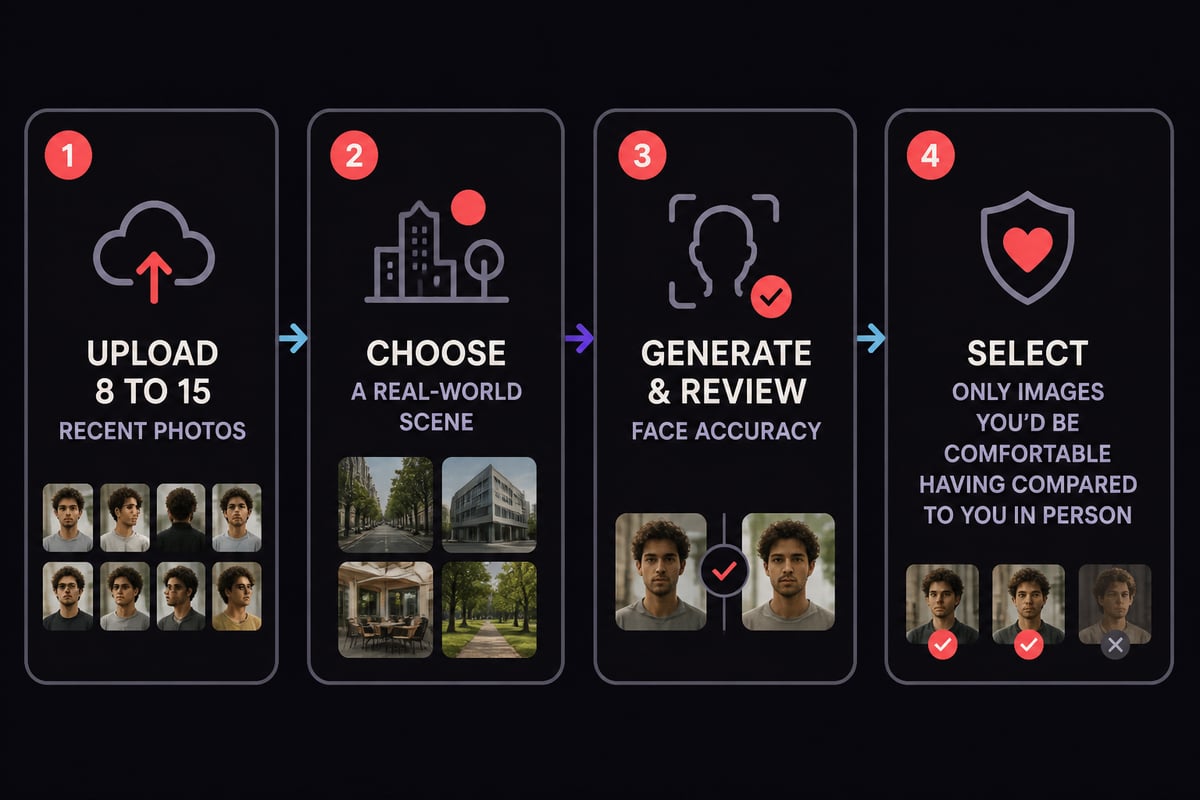
AI generation from reference photos follows a repeatable sequence, and the quality of your inputs decides the quality of the output. Here is the workflow from start to finish.
- Collect reference photos. Use 8 to 15 recent images that show your face from several angles, in different lighting, with and without glasses if you wear them. Recent matters: a photo from five years ago teaches the model a face you no longer have.
- Choose the scene. Decide where you want to appear: a cafe, a trailhead, a conference lobby, a city street. Real places and candid framing read as more honest than studio backdrops.
- Generate and review. Look at your face first, then the hands, then the background. Check whether the result still resembles you at a glance.
- Select and use. Keep the images that you would be comfortable having someone compare against you in person.
Tools differ in what they do with your face. Some may smooth skin, slim features or soften age lines by default, which defeats the purpose if the goal is to show people who they will actually meet. If you want to understand why some outputs drift from your real appearance, the post on why AI photos don't look like me explains the common causes.
Prepare Your Reference Photos
Your reference photos set the ceiling for every image the AI produces, so spend your effort here before generating anything. Weak inputs create a generic face. Strong inputs create a recognizable one.
A good reference set has these qualities:
- Variety of angles: Front, three-quarter left, three-quarter right and a slight profile.
- Variety of expressions: A relaxed face, a real smile and a neutral look.
- Natural light: Window light or open shade works better than a harsh flash.
- No heavy filters: Beauty filters teach the model a face that does not exist.
- Only you in frame: Group photos confuse the model about which face to learn.
Rejected uploads are a common frustration. If a tool refuses your images, the guide on why AI photo uploads get rejected covers the usual reasons, such as low resolution, sunglasses or multiple faces.
Privacy deserves a check before you upload anything. Ask whether your images are kept private and whether they are used to train other models, and read the tool's data policy. For background on what happens after upload, see what happens to photos you upload.
Match the Scene to Where the Photo Will Be Used
The destination of the image should drive the scene you choose, because a good photo on the wrong platform still underperforms. Dating apps and professional networks reward different settings.
| Where it will appear | Scene that works | Scene to avoid |
|---|---|---|
| Dating profile | Cafe, park, weekend market, hiking trail | Gym mirror, car selfie, heavy nightlife |
| LinkedIn or work bio | Office lobby, bright workspace, conference setting | Beach, party, cropped group shot |
| Travel or social feed | Recognizable landmark, street, coastline | Generic stock-looking backdrops |
For dating, the setting tells a story about how you spend your time. The article on dating profile lifestyle photos goes through which activities signal what, and dating photo backgrounds covers how to choose a backdrop that supports your face instead of competing with it.
For work, the priority is to look approachable and credible. If you need a LinkedIn image without booking a studio, the walkthrough on professional headshots without a photographer lays out the practical options.
Get Lighting, Scale and Framing Right
A believable composite depends on three physical details: the direction of light, the size of the person relative to the surroundings, and the framing of the shot. Generative tools handle much of this automatically, but you can steer the outcome with better choices up front.
Lighting. Light should fall on your face from the same side it falls on the rest of the scene. If the scene shows late afternoon sun from the left, shadows on your face should fall right. Mismatched light is the fastest tell of a fake.
Scale. A person in a doorway should fit the doorway. A person next to a car should be roughly car-height at the shoulder. If the proportions feel off, the image will look pasted, whatever the pixel quality.
Framing. Candid framing beats a posed, centered shot. A slight angle, a partial turn, or a glance off-camera reads as a moment instead of a portrait. If you want to improve how you present in the real photos you take as references, the guides on how to pose for photos and how to look confident in photos are a useful starting point.
Keep Your Face as It Is
The most important quality check is whether the person in the image would be recognized by someone meeting you in person. A photo with a picture of you in a scenic location is only useful if the face stays honest.
Watch for these drift problems:
- Skin tone shifted lighter or darker than your own
- Features slimmed, jaw reshaped or nose narrowed
- Apparent age changed, either younger or older
- Tattoos, scars or freckles removed or invented
- Body proportions altered
Several of these have dedicated write-ups: AI photos that changed my skin tone, AI photos that are ageing you, and AI photos when you have tattoos. If you know your own face well, a side-by-side comparison with a recent unedited selfie will reveal most problems in under a minute.
Dating apps add another consideration. Some platforms and users run face checks, and a heavily altered image can fail them.
A Service Built Around Your Real Likeness
CMeIn's AI photos that look like you place you at the center of a real-looking moment, such as a trip, a weekend plan or a profile shot, while your face stays unchanged. There is no studio gloss, and the service focuses on keeping your likeness without retouching. You can review the pricing page to see how the offering works.
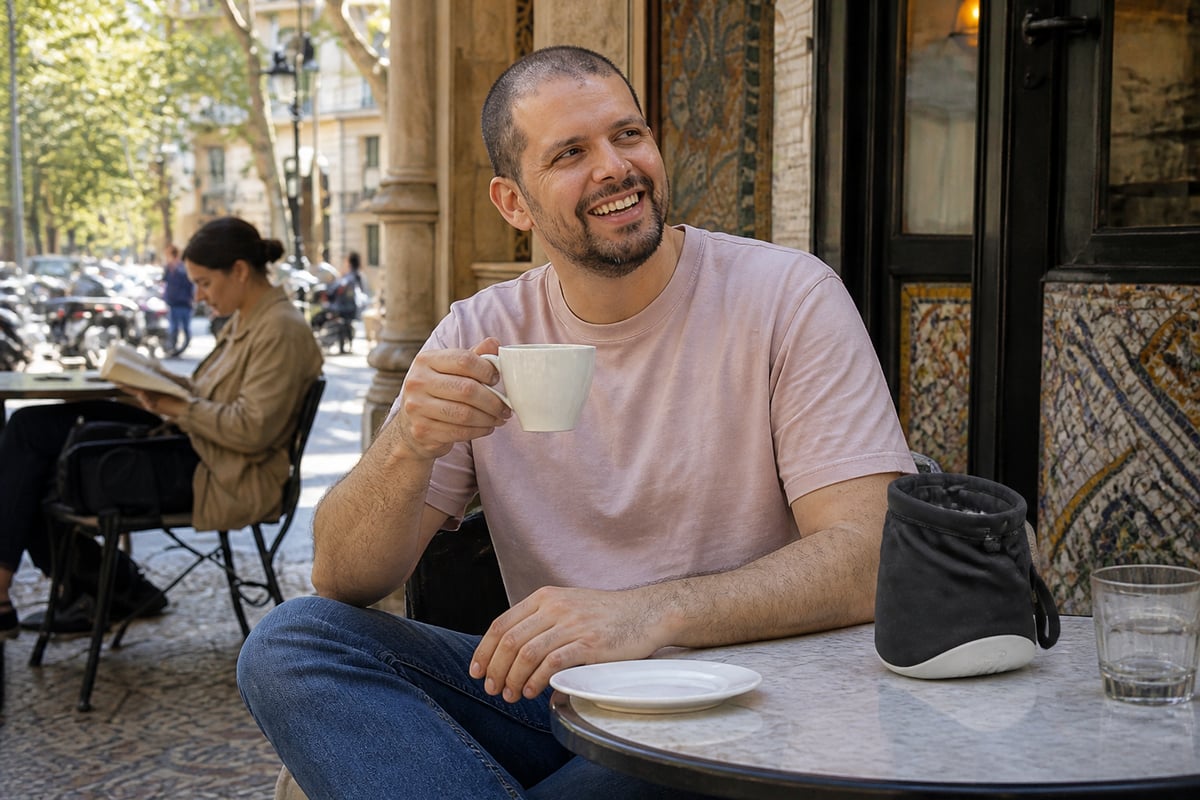
This approach suits two groups: singles who want dating photos that match how they look in person, and professionals who need a believable LinkedIn image or work photo. It does not suit anyone who wants a younger, slimmer or smoother version of themselves, and it should never be used with another person's face.
Check the Result Before You Publish
A short review routine protects you from posting an image that undermines your credibility. Run through it every time.
- The friend test. Show the image to someone who knows you and ask who it is. If they hesitate, regenerate.
- The zoom check. Enlarge the image and inspect hands, ears, teeth and any text in the background. Errors cluster in these areas.
- The context check. Confirm the scene is believable for the platform. A boardroom image on a casual dating app looks odd.
- The honesty check. Ask whether you would be comfortable if a date or colleague compared the photo to you in person.
Understanding how far these tools can go also helps set expectations. If you are weighing several images, the piece on how many AI photos are usable sets realistic expectations about selection.
Common Mistakes When Adding Yourself to a Picture
Most failed attempts trace back to a short list of avoidable errors.
- Using one selfie as the only reference. A single angle produces a flat, generic result.
- Choosing a scene that does not fit the platform. A yacht photo on a casual profile invites skepticism.
- Over-editing afterward. Layering filters on a generated image reintroduces the smoothing you tried to avoid.
- Posting only composites. Mix generated images with at least one or two unedited recent photos so the profile stays grounded.
- Ignoring pricing structure. Subscriptions that renew automatically can cost more than expected, so read the terms. The comparison of subscription versus credits and the list of AI photo tool pricing traps are worth reading before you commit.
Creative work beyond personal photos can also benefit from careful visual planning. Consistent, credible visuals help build trust with an audience, and the same principle applies to a personal profile: consistency and honesty tend to outperform polish.
Practical Uses Beyond Dating and Work
Placing yourself in a scene has everyday uses beyond a profile photo, and the same rules about likeness still apply.
- Travel imagery: Generate yourself at a destination you plan to visit, or revisit a trip you took without good photos. The guide to creating travel photos with AI shows how to keep these believable. Travelers planning real trips often want polished imagery to commemorate the experience.
- Social media avatars: A consistent profile picture across platforms builds recognition.
- Themed photo sets: Some services group images by purpose, which the post on photo packs describes.
Pick five recent, unfiltered photos of yourself in different lighting and compare them against any image you plan to post; if a generated version looks more like a stranger than like those five, regenerate it. When you want images that keep your face exactly as it is, CMeIn's AI photos that look like you put you inside real-feeling scenes without retouching, and you can start with your photos to see how your own likeness translates.