How to Combine Two Photos Into One Image
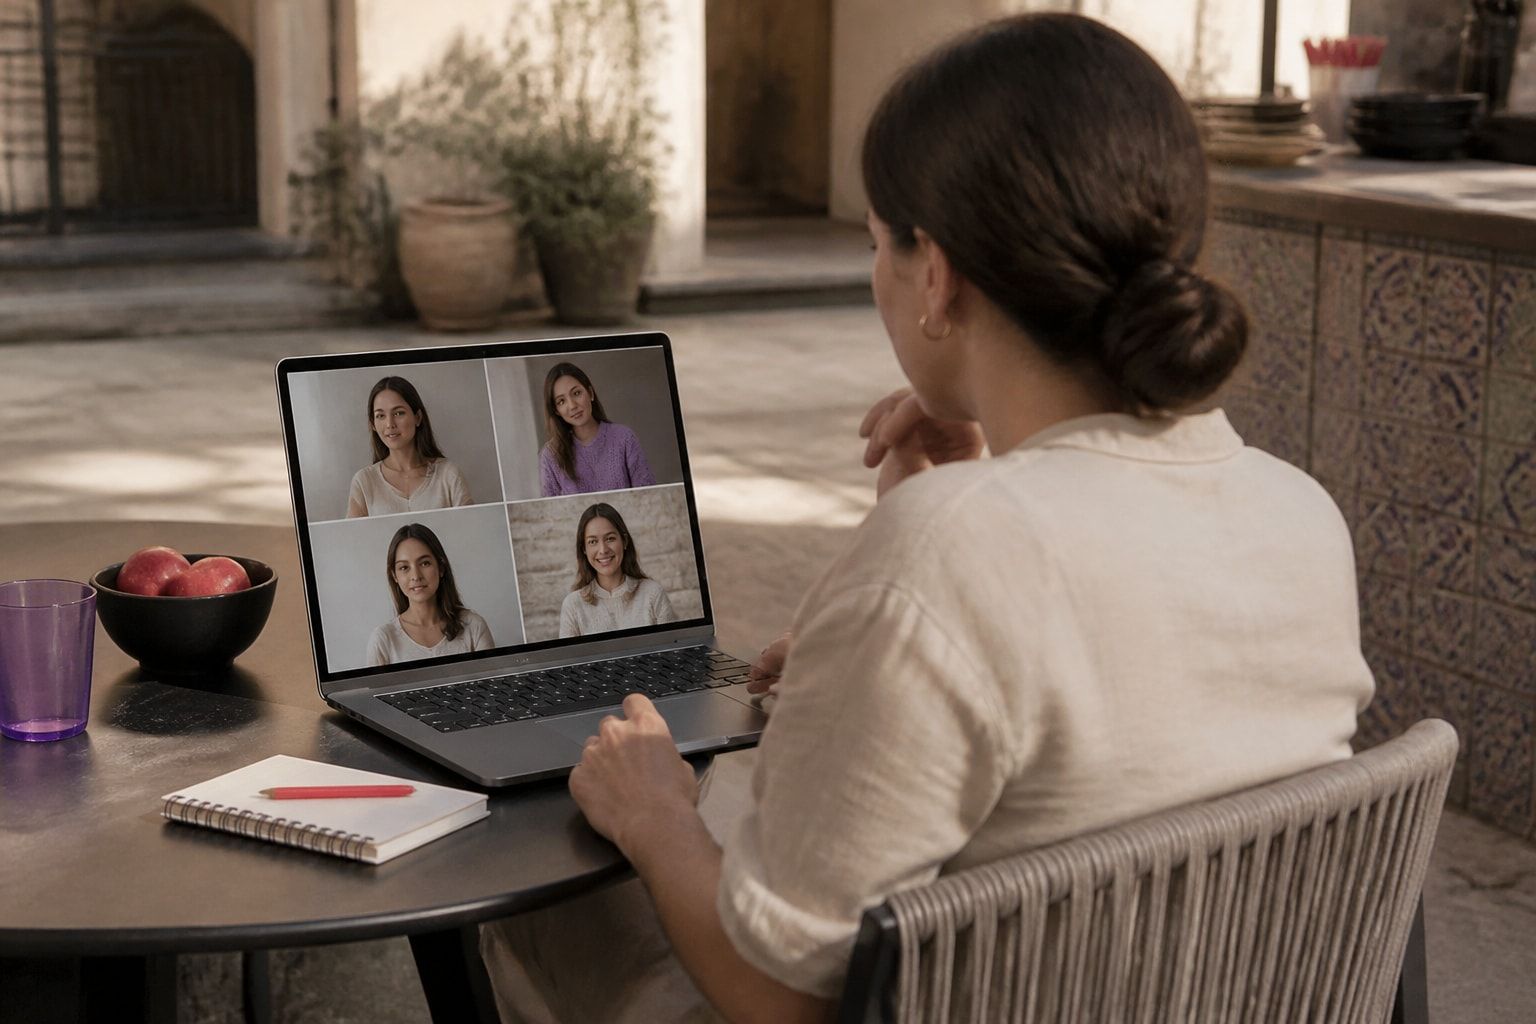
To turn two photos to one image, place both pictures on a single canvas and arrange them side by side, stacked, or layered, then export the result as one file. Free browser tools handle simple layouts in under a minute, while editors such as Photoshop give you control over blending, masking, and exact placement.
The right method depends on what you want the final image to do. A before-and-after comparison needs a clean split. A creative double exposure needs blend modes. A profile picture for a dating app or LinkedIn needs something different: a result that still looks like the real you. This guide covers each approach, the settings that protect image quality, and the point where combining photos stops being the right tool.
Which Method Fits Your Goal
The best way to merge photos is the one that matches the finished image you have in mind. Four approaches cover almost every case.
- Side-by-side or stacked layout: Two photos sit next to each other or one above the other with no overlap. Best for comparisons, collages, and social posts.
- Layered blend: One photo sits on top of the other with adjusted opacity or a blend mode. Best for double exposure and artistic effects.
- Masked composite: You cut or paint away parts of one photo so the other shows through. Best for placing a person from one photo into another scene.
- AI scene generation: Software builds a new photo from your reference images instead of pasting them together. Best when you want a realistic photo in a setting you never photographed.
Choosing before you open an app saves time. Most frustration comes from using a layout tool when the goal needed a blend, or the reverse.
How to Put Two Photos Side by Side or Stacked
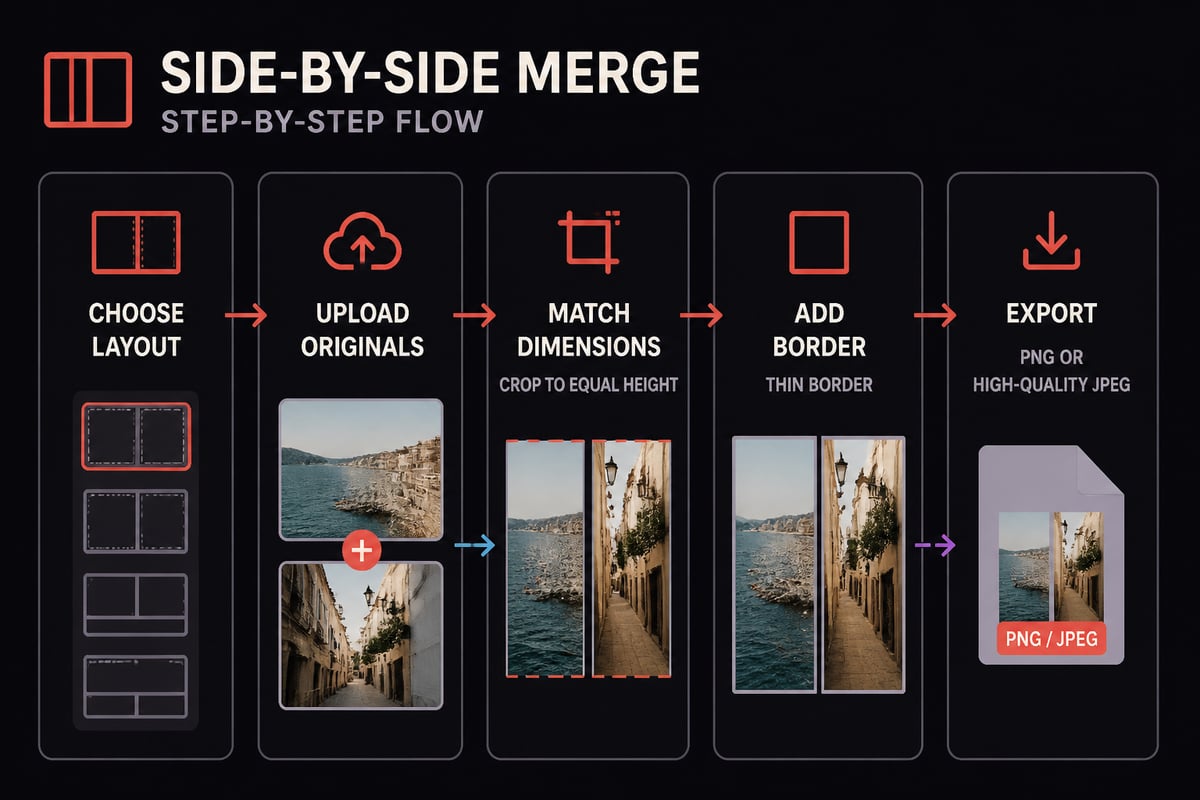
A side-by-side merge is the fastest way to get two photos in one frame, and it works the same way in nearly every online tool and phone app. The steps are consistent enough to follow anywhere.
- Choose a layout. Pick horizontal (side by side) or vertical (stacked). Landscape photos usually stack well; portraits usually sit side by side.
- Upload both images. Keep the originals at full resolution. Compressing before merging lowers the quality of the final file.
- Match the dimensions. Crop both photos to the same height for a side-by-side layout, or the same width for a stacked one. Mismatched sizes leave awkward gaps.
- Adjust spacing. A thin white or neutral border between the images looks deliberate. No border looks fine for before-and-after shots.
- Export in a lossless or high-quality format. PNG preserves detail. JPEG at high quality works for web posting.
On an iPhone or Android phone, the built-in Photos editor does not merge images, so a free layout app or the Shortcuts app on iOS is the usual route. Online merger tools work in any browser and need no installation.
Blending Two Photos Into One With Layers
Layering is how you build a true composite rather than a simple pair. In Photoshop, each image goes on its own layer, and you reposition and resize layers to create the composition. Once the second photo sits above the first, you can experiment with layer blend modes to combine the image content in different ways.
The most useful starting points are:
- Opacity: Lowering the top layer to 40 to 60 percent produces a soft double exposure.
- Multiply: Darkens the result and works well when the top photo has a light background.
- Screen: Lightens the result and suits photos with dark backgrounds.
- Overlay: Increases contrast where the two images meet.
A layer mask gives you finer control than opacity alone. Paint black on the mask to hide parts of the top photo and white to reveal them. This is the technique behind placing a subject into a new background without a visible edge.
What Auto-Blend Layers Can and Cannot Do
Photoshop's Auto-Blend Layers command automates part of this work, but it has firm limits. It works only with RGB or Grayscale images and does not work with Smart Objects, video layers, 3D layers, or background layers. If the command appears greyed out, convert your background layer to a regular layer and rasterize any Smart Objects first.
The command also offers two objectives. Panorama blends overlapping layers into a panorama, while Stack Images blends corresponding details and works best with aligned layers. For two unrelated photos, neither objective is usually the right choice. It suits shots of the same scene taken a moment apart, such as two exposures of one view.
Turning Two Photos Into One Photo of the Same Person
Combining two photos of the same person into a single usable image is a common goal for anyone refreshing a profile, and it is where simple merging often falls short. A collage of two headshots fits some purposes, but a single, strong profile photo is what dating apps and LinkedIn actually display.
Two situations come up repeatedly:
- Two good faces, one good background. You have a photo where your expression is right and another where the setting is right. Masking can place the better face into the better scene, but lighting direction, skin tone, and edge quality must match, or the seams show.
- A group photo you want to crop. You can cut yourself out of a shared photo and place yourself on a cleaner background. The result often looks pasted, because the lighting on you was set by the original scene.
Skin tone is a frequent trouble spot in composites, since two photos taken under different light never match perfectly. If color drift is something you have noticed, the guide on why AI photos can change your skin tone explains how color shifts happen and how to spot them early.
For dating profiles in particular, an obviously stitched image raises questions. Matches expect a photo that reflects how you look in person, and a clean, honest single frame does more for you than a clever edit. The advice on choosing dating profile photos that feel like you covers what reads as authentic.
Keeping Quality High When You Merge
Merging does not have to reduce quality, but several common habits do. Following a short set of rules prevents most problems.
| Setting | Recommended practice | Why it matters |
|---|---|---|
| Source files | Use originals, not screenshots or messaging-app copies | Chat apps compress images heavily |
| Canvas size | Build the canvas at the final output size or larger | Scaling up later blurs detail |
| Export format | PNG for detail, high-quality JPEG for web | Repeated JPEG saves lose sharpness |
| Resizing | Scale down rather than up | Enlarging invents pixels and softens edges |
| Color mode | Work in RGB | Required by tools such as Auto-Blend Layers |
Resolution is the most common culprit. If one source photo is much smaller than the other, the merged image will show the weaker photo's softness. Crop to the strongest areas of each picture and avoid stretching either one to fill space.
Edges deserve attention as well. When you cut a subject out, zoom to 200 percent and check for halos, the thin bright or dark outline left from the original background. Feathering the mask by one or two pixels usually removes them.
Combining Photos for Dating Profiles and LinkedIn
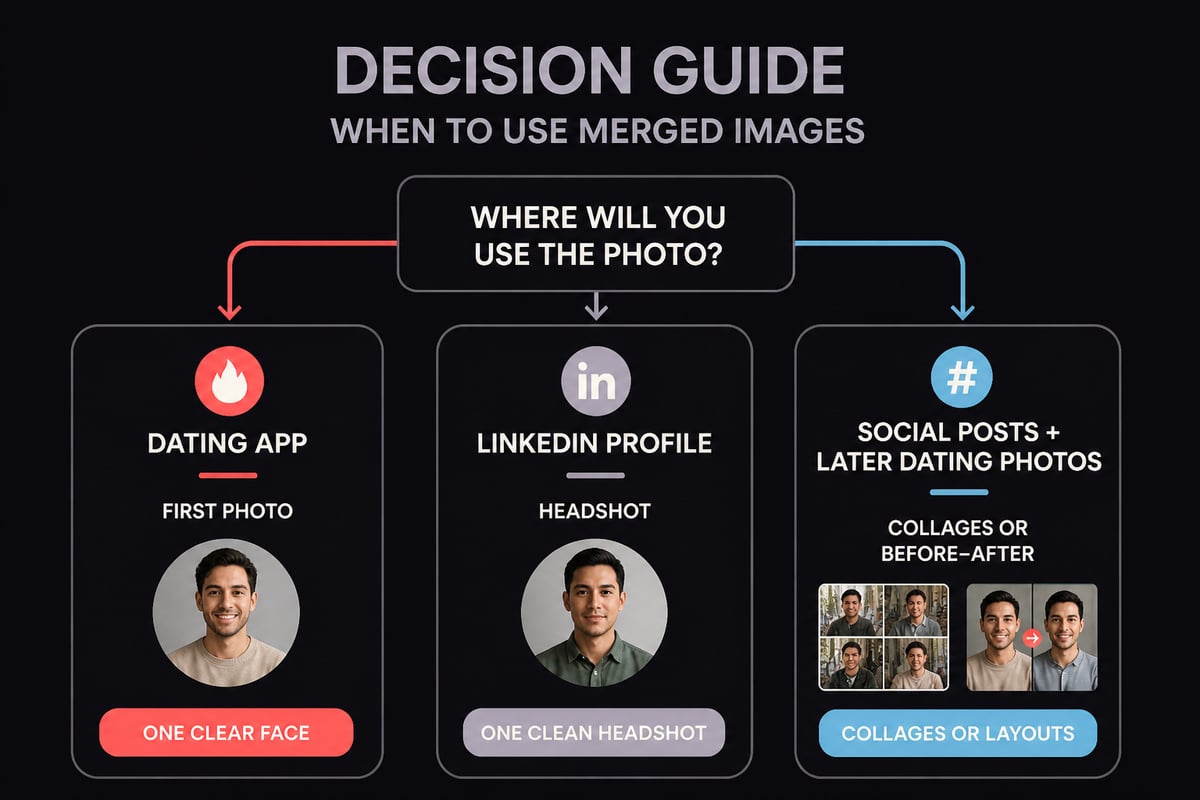
Merged images work for some profile uses and fail for others, so the platform should guide the choice. A few practical rules apply.
On dating apps, the first photo is judged in a fraction of a second, and it needs to show one clear face. A split image of two photos reduces the face to half the frame. Use a collage only as a later photo, if at all. The breakdown of what photos work best on dating apps explains the order and mix that tend to perform well. If you plan to include shared moments, the notes on group photos on dating apps cover how to handle them without confusing viewers.
On LinkedIn, a single, well-lit headshot is the standard. A before-and-after or a collage can suit a personal brand post, but the profile picture itself should be one clean frame. The guide to choosing an AI LinkedIn headshot that still looks like you is useful if your current photos are dated or poorly lit.
Wedding and portrait work offers a helpful comparison. A professional photographer composes each frame in camera, with attention to light and framing, so nothing needs stitching afterward. That is the standard worth aiming for: a single image that looks natural without edits.
When Merging Stops Working and a Generated Photo Helps
Merging has a ceiling. Two photos can only show what the photos already contain, and no amount of masking turns a cropped selfie into a candid shot on a real street. When the setting or framing you want does not exist in your camera roll, a generated photo is the more direct route.
CMeIn creates realistic AI photos from your reference photos, placing you in scenes such as dating profiles, social media, and travel. It is designed to keep your likeness rather than retouch it, and it favors real-looking scenes over studio backdrops. For someone who wants photos that match how they look in person, that is the practical difference from heavy retouching.
A few points make the choice clearer:
- Privacy: Your uploads are kept private.
- Pricing: Check current plans on the CMeIn site before you buy.
- Platforms: The images can be used across social and professional platforms.
Generated photos suit people who want an honest image in a better setting. They are not a way to look younger or slimmer than you are, and CMeIn is not built for that. They also should not be used with anyone else's face. If you want to know where this technique helps and where it does not, what AI dating photos can and cannot do is a straightforward read.
Common Mistakes to Avoid
Most failed merges share the same few causes. Checking for them before you export saves a second attempt.
- Mismatched lighting. If one photo is lit from the left and the other from the right, the composite looks wrong even when the edges are clean. Choose photos with similar light direction.
- Inconsistent scale. A face that is larger in one half of a side-by-side image looks accidental. Crop both to a similar framing.
- Heavy filters applied to only one photo. Apply any color grading to the finished image, not to one half.
- Over-smoothing. Retouching one face until the skin looks plastic makes the pair feel unmatched. For profile use, it also misrepresents you.
- Exporting too small. A 600-pixel image looks soft on a modern phone screen. Export larger than you think you need.
Posing affects the raw material too. Two photos with a relaxed, natural expression merge more convincingly than two stiff ones, and the tips on how to pose for photos apply whether you are shooting new images or choosing among old ones.
Frequently Asked Questions
Can I combine two photos into one for free?
Yes. Many free browser-based mergers and layout apps handle side-by-side and stacked arrangements. Photoshop and similar editors are paid, though some offer free trials.
Will merging two photos lower the quality?
Not if you start with the original files, build the canvas at the final size, and export as PNG or a high-quality JPEG. Quality drops when you merge compressed copies or enlarge small images.
What is the easiest way to combine photos on a phone?
A free layout or collage app is the simplest route on both iOS and Android. Choose a grid with two cells, drop in each photo, adjust the crop, and save at the highest quality setting.
How do I make two photos look like a single photograph?
Match the lighting direction, color temperature, and scale of both images, use a feathered mask along any cut edge, and apply one color adjustment over the whole composite. Without those matches, the seam usually shows.
Is it acceptable to use a merged image on a dating profile?
A collage can work as a secondary photo, but the first image should show one clear, honest view of your face. Heavily edited composites risk misleading matches, which tends to backfire when you meet in person.
Pick your two best, most recent photos today and decide whether your goal is a layout, a blend, or a single new image, because that choice determines every step after it. If what you really need is one natural photo in a better setting, start with your photos and let CMeIn build realistic images that still look like you, with your uploads kept private and no subscription required.